
Follow up on a submitted ticket
As an admin, it’s your responsibility to follow up on issues (tickets that have been submitted by your operators). Here’s what you can do:
See the list of issues in your workspace
- Go to Continuous Improvement in the side panel.
- To see the list of all issues in your workspace, Select the All issues tab. This is the first tab that will be opened by default when you visit the Continuous Improvement add-on.
- To see the list of issues from a specific improvement board: Click that improvement board’s tab.
See an issue
- Go to Continuous Improvement in the side panel.
- Click the issue that you wish to see.
Following Up an Issue
Editing an Issue
As an admin, you can edit an issue (a ticket that has been sent by an operator). Here are the editing possibilities:
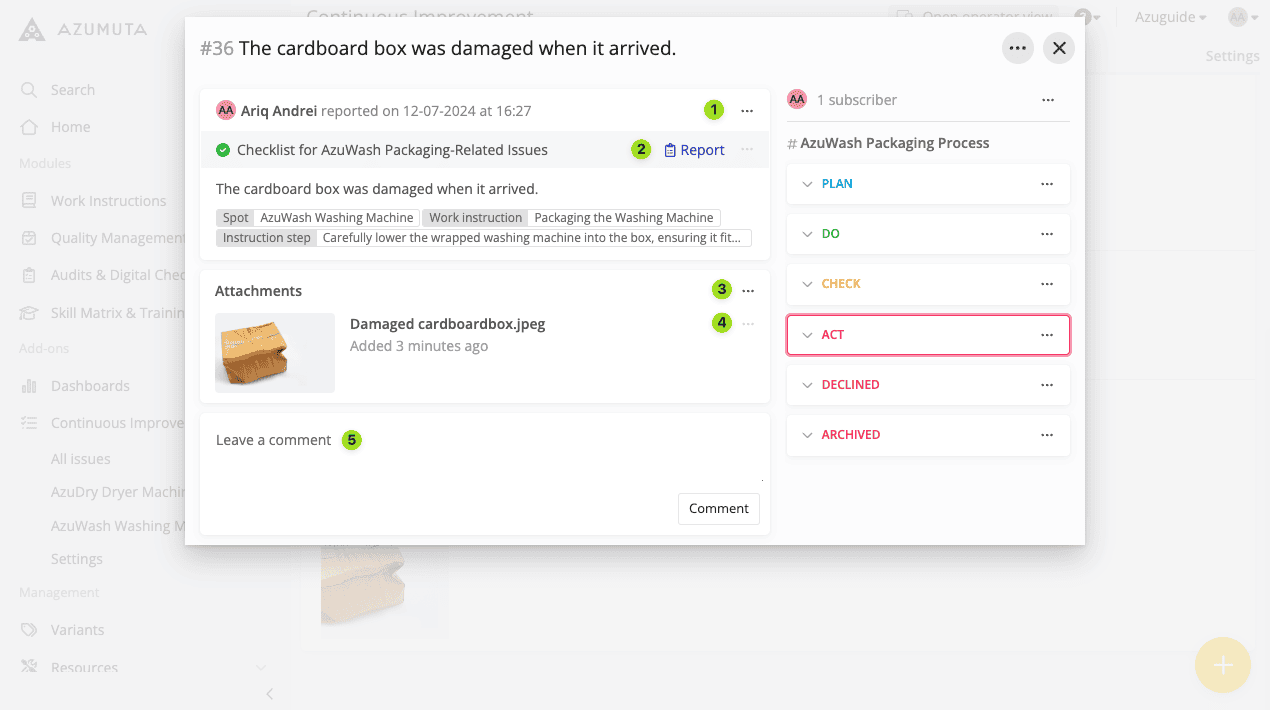
- Click to open the option to edit the operator’s remark.
- Click to view the ticket checklist (if you included it in the improvement flow).
- Click to open the option to upload additional files to the issue.
- Click to open the option to download/remove the image sent by the operator, or to copy it to the image library.
- Click to type in additional comments, and click Comment in the bottom right corner of the field when you’re done.
Following Up on Issue Statuses
On the right part of the menu, you can see the list of issue statuses. The existing statuses will be based on the improvement board’s template that you choose when creating that improvement board.
In the image below, we used the PDCA (Plan, Do, Check, Act) template.
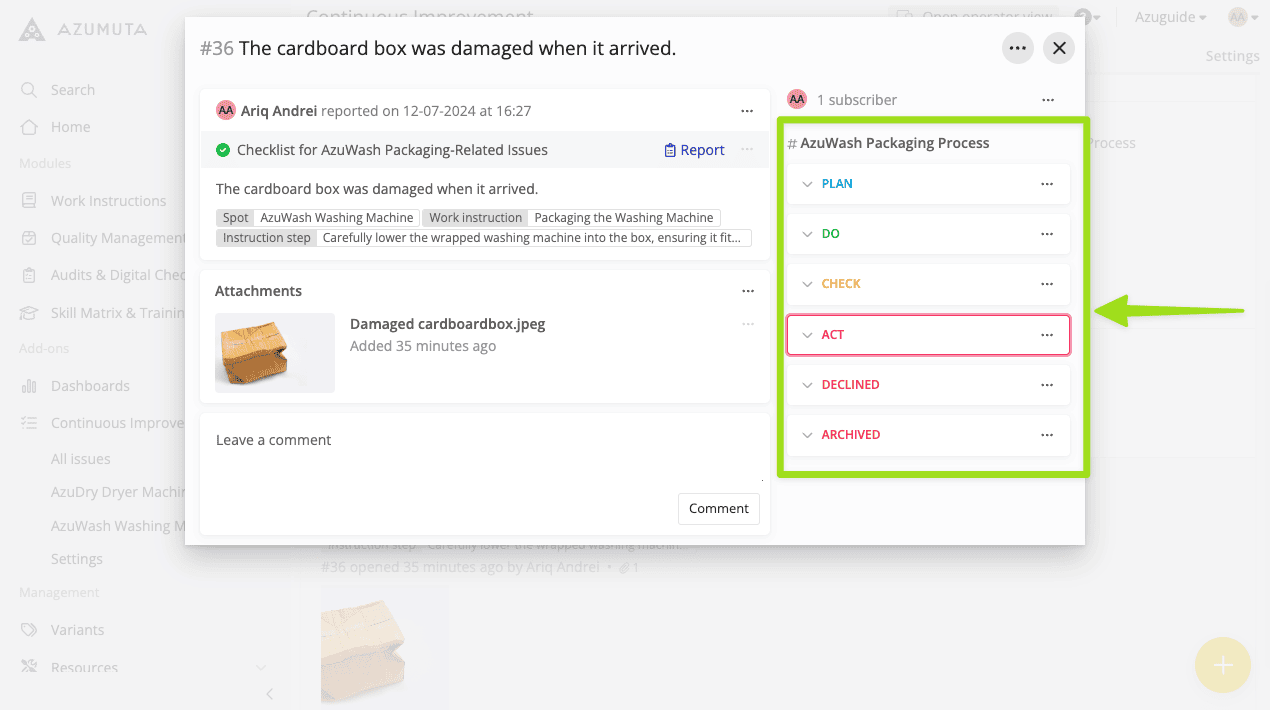
Change an issue’s status
- Click the ⋮ (three-dot) icon next to the status that you would like to change into.
- Click Move to this column.
- Click Yes.
What Can You Do in Each Issue Status?
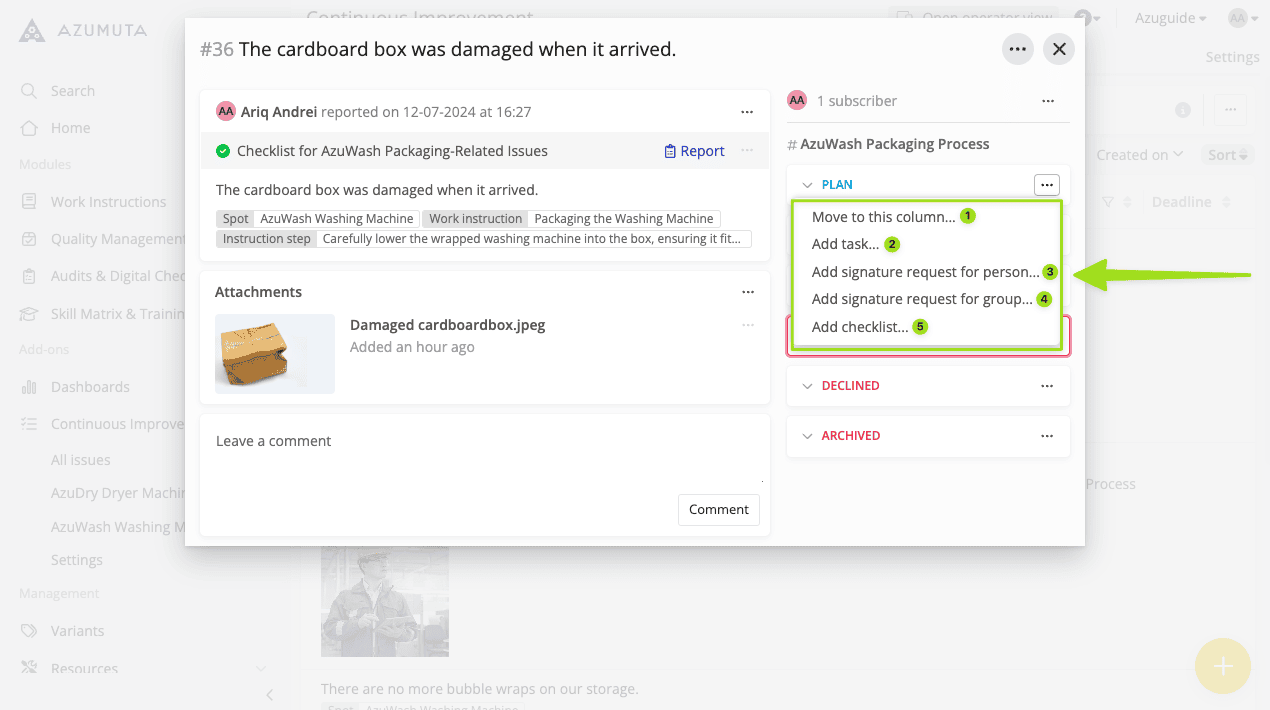
- Click to move the issue to that status.
- Click to add a task (which can be assigned to yourself, to a specific person, or to a user group).
- Click to add a signature request for a specific person (generally used to ask for a supervisor’s approval).
- Click to add a signature request for a user group.
- Click to add a checklist.
Close an issue
In order to close an issue, you must move its status to either Archived (for issues that are resolved )or Declined (for issues that are declined)
See the list of past closed issues
- Go to Continuous Improvement in the side panel.
- Go to the targeted improvement board
- Click the ⋮ (three-dot) icon.
- Click Declined & archived.
See an issue’s history
Here’s how you can see an issue’s past activities (including movements between columns and actions such as signature requests).
- Go to Continuous Improvement in the side panel.
- Go to the improvement board that contains the issue that you would like to see the history of.
- Click the targeted issue.
- Click the ⋮ (three-dot) icon next to the close icon.
- Click Show activity.